Design Principles 
&
Tips on Import Designing
Hey there and welcome to the world of Rexal design principles!
Remember, we're all about creating a space where creativity shines, while keeping design rules consise and in line with the species guidelines. As you get your design gears grinding, always make sure to follow the guides of the markings you are working on. The rules on those pages come first and foremost!
 Design Rules
|
Design Principles
|
Naming Rules
Just like any area in our own world, Rexals have specific naming conventions and rules for naming children. While we aim to keep our naming guidelines flexible, we must ensure that names are appropriate and do not break the lore, as we are primarily a roleplay group. We strive to maintain the lore as much as possible while adhering to all rules of propriety. These are your characters, but immersion is crucial for many players. If you would like a name that does not conform to these rules, you are welcome to use it in the nickname field of your character, which you can freely edit, as long as it is not offensive.
Official Rexal Names (the name registered with the site) should not be sentences, phrases, or titles. This includes song lyrics, quotes, or anything that you might stereotypically expect to find in a real-world horse registry. Additionally, names must also follow the ToS; this means no slurs or foul language.
- Human-like Names: Rexal names should always be relatively "human" – no pet names ("Fluffy", "Mr. Snuggles"). These belong into the Nickname Field.
- Gibberish or Random Characters: Names should not be strings of random characters or gibberish ("asdfghjkl", "12345", "qwerty").
- Overtly Modern Slang or Memes: Avoid using overtly modern slang, internet memes, or trends that may date quickly or be inappropriate ("YOLO", "DabMaster", "EpicFail").
- Inappropriate or Offensive Content: Names must not include any content that can be considered offensive, inappropriate, or controversial.
- Contextually Relevant Names: Names that would be fine in another language but are in English instead are also fine, like "Compliance" or "Auspicious".
- Word Plays: You are able to do plays on words, for example, make Fluffy into Flufflius to make it sound like a name if you want a name that's humorous but still fits within the parameters.
- Lore Compatibility: A name cannot reference anything that currently doesn't fit heavily into the lore. Don't name your rexal "Spaceshippius."
- Words with no real world connotation: Completely made up words are permitted, however, please make sure they do not have a meaning in any other language that go against the rules.
Always look words up before you name your rex. Something that sounds fine in English might mean something different in another language. Be careful when using words you don't know explicitly the meaning of.
Clarification on horse names: Names that resemble typical horse registry names are not permitted. Typical horse registry names often include phrases, and can sometimes form entire sentences. Two or more words that describe something are mostly what you need to look out for. These names need to go into the nickname section of the rexal!
Clarification on titles: Titles are generally straightforward, but it's essential to be cautious not to inadvertently use words that can be interpreted as titles, even if they aren't commonly seen as such. These could include words like "Mother," "The," or "Mister." Job titles should not be used as titles, either. "Baker John" for example would get denied, but "John Baker" is allowed since it is clear it is a surname. Additionally to this, jobs as their only names is allowed, however, only traceable irl names such as "Hunter", however "Chancellor" would not be. Always research your chosen words beforehand to ensure they do not have an unintended title usage. Official titles can be gained later in the game!
Lore Names: If you wish to align with the game's lore, we recommend choosing names that were historically used in ancient Greece. However, with new locations being uncovered, names from those regions are also acceptable. For instance, the Posian Islands are set in the late medieval period of Britain, so names like "Beatrice" are suitable.
Additionally, it is worth noting that English names are a relatively new phenomenon in Rexalia, as Rexals have only recently discovered and begun to adopt the language of those who inhabited the islands before them. This marks the first time this information is being shared publicly, and English names and letters are gradually becoming more common on the islands.
Keep in mind that Rexals are people, and names that are wildly unconventional may attract attention.
These Imports come in the form of PSDs, which are opened and edited in drawing programs.
 |
Digital Drawing Programs: All designs must be created using a digital drawing program. These are software that allow you to draw, paint and design on a digital canvas using tools that mimic traditional art methods. Popular examples include Photoshop, Clip Studio Paint, Procreate and even free online options like Krita and MediBang Paint. Note that physical, hand-drawn designs cannot be accepted as they need to be digitally editable for the design check process. What are PSDs? PSD stands for Photoshop Document. It's a layered image file used in Adobe Photoshop, a digital drawing program. A PSD file allows an artist to work with individual layers of an image even after the file has been saved. This is particularly useful in design projects like Rexal designs where multiple separate elements (like base coats, markings, and accessories) can be managed independently. Don't worry if you're not using Photoshop - most digital art programs can open and save in PSD format. |
| As you design your Rexal on the import base, the genotype is your guide. It tells you the genetic attributes your Rexal has inherited and you bring these to life through your design. | 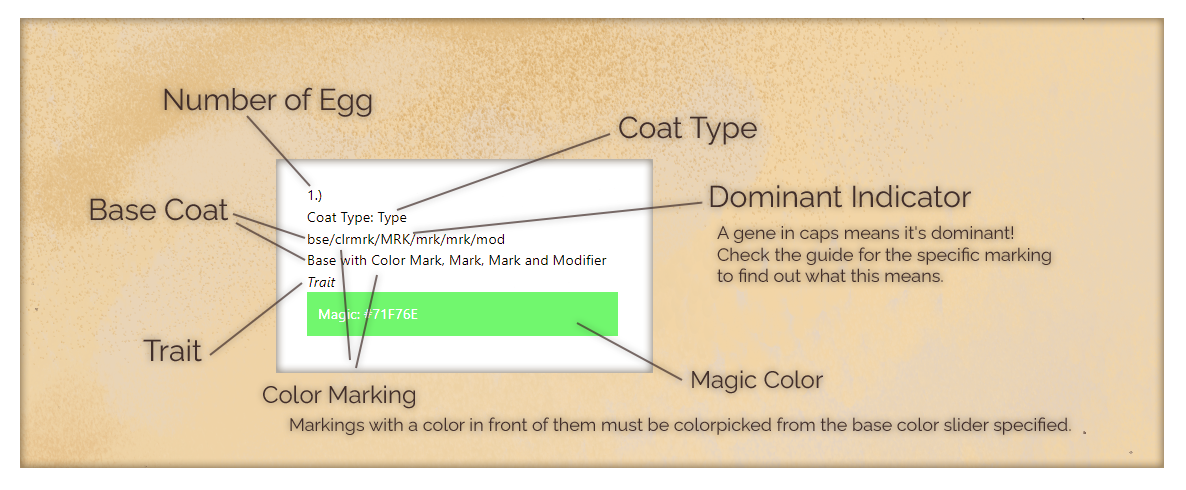 |
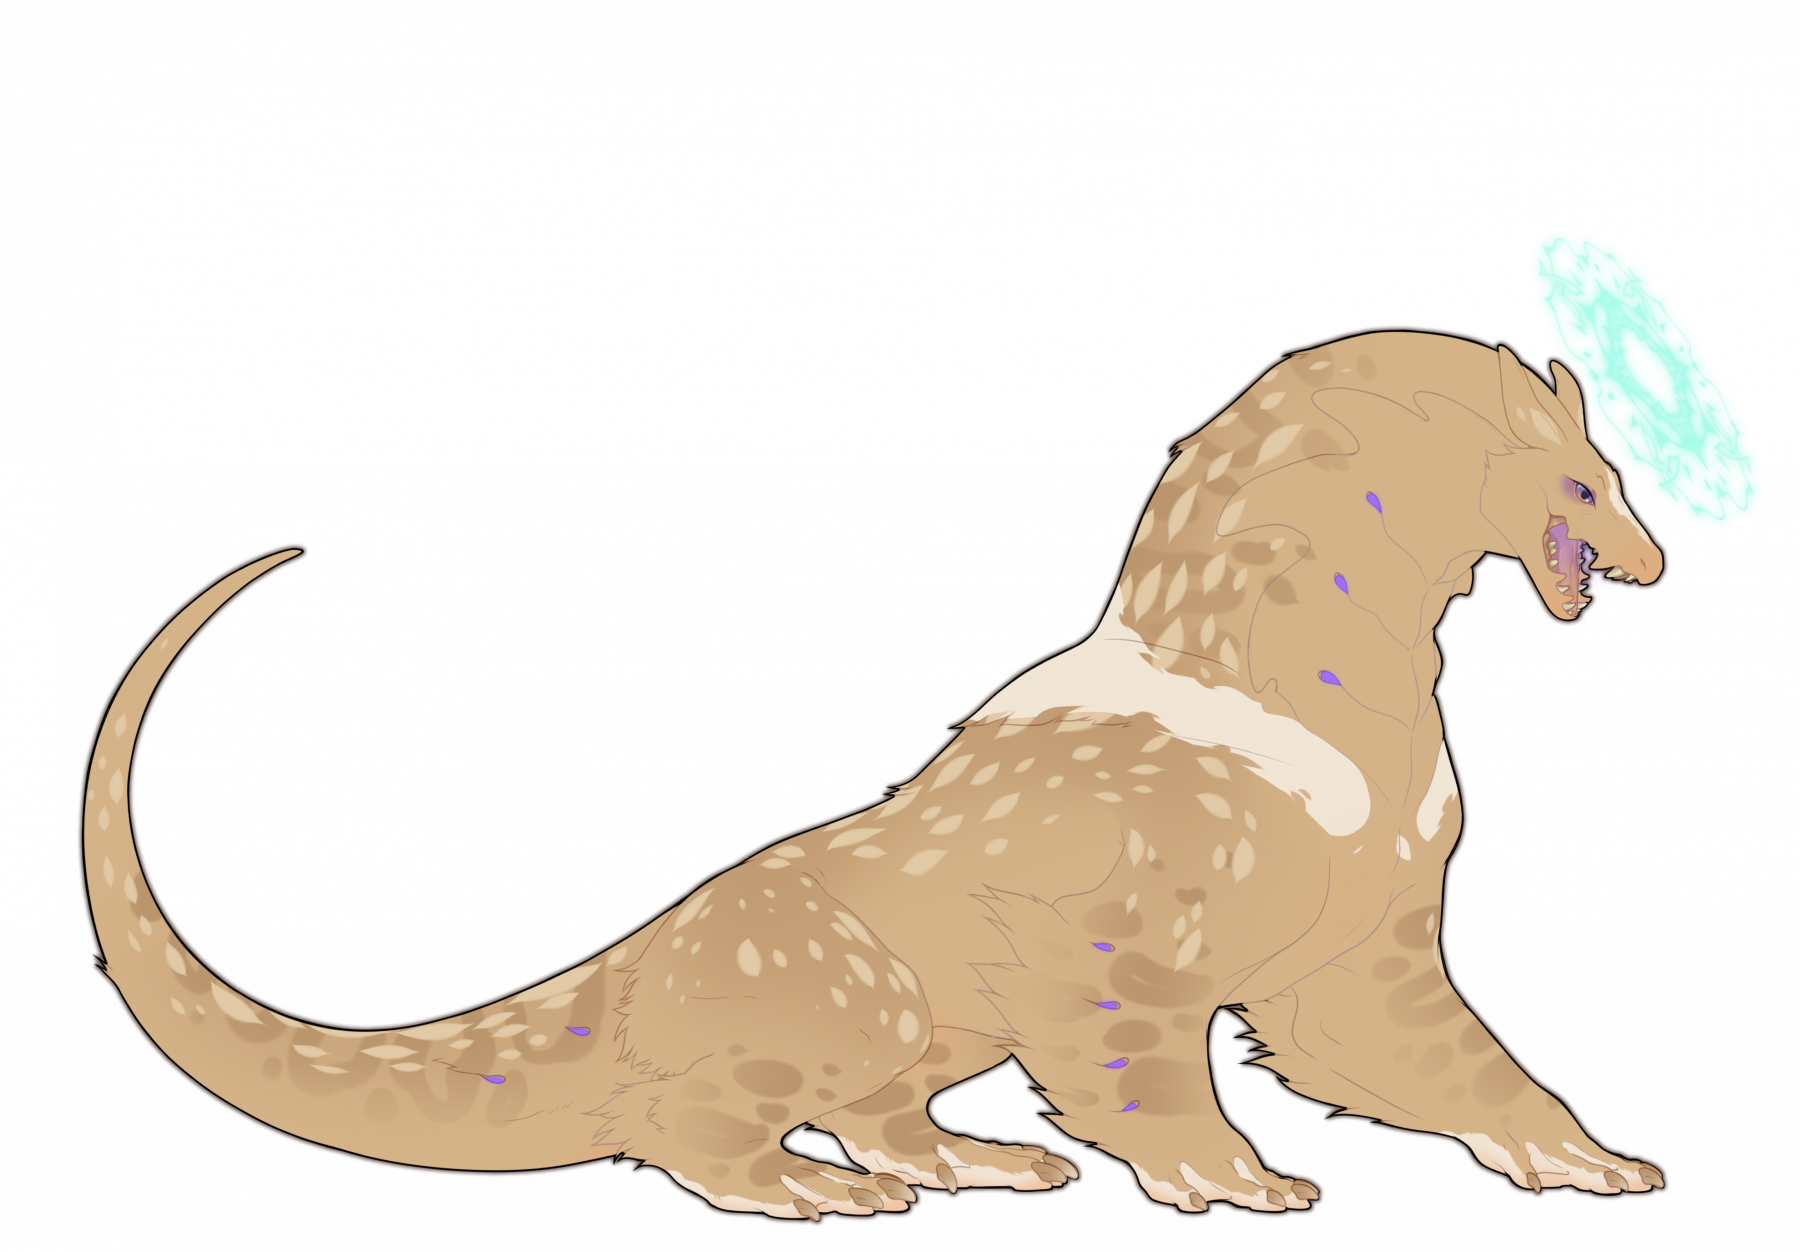
The first line of your geno tells you the coat type of your rex. The two are armored and furred, so it will be one or the other.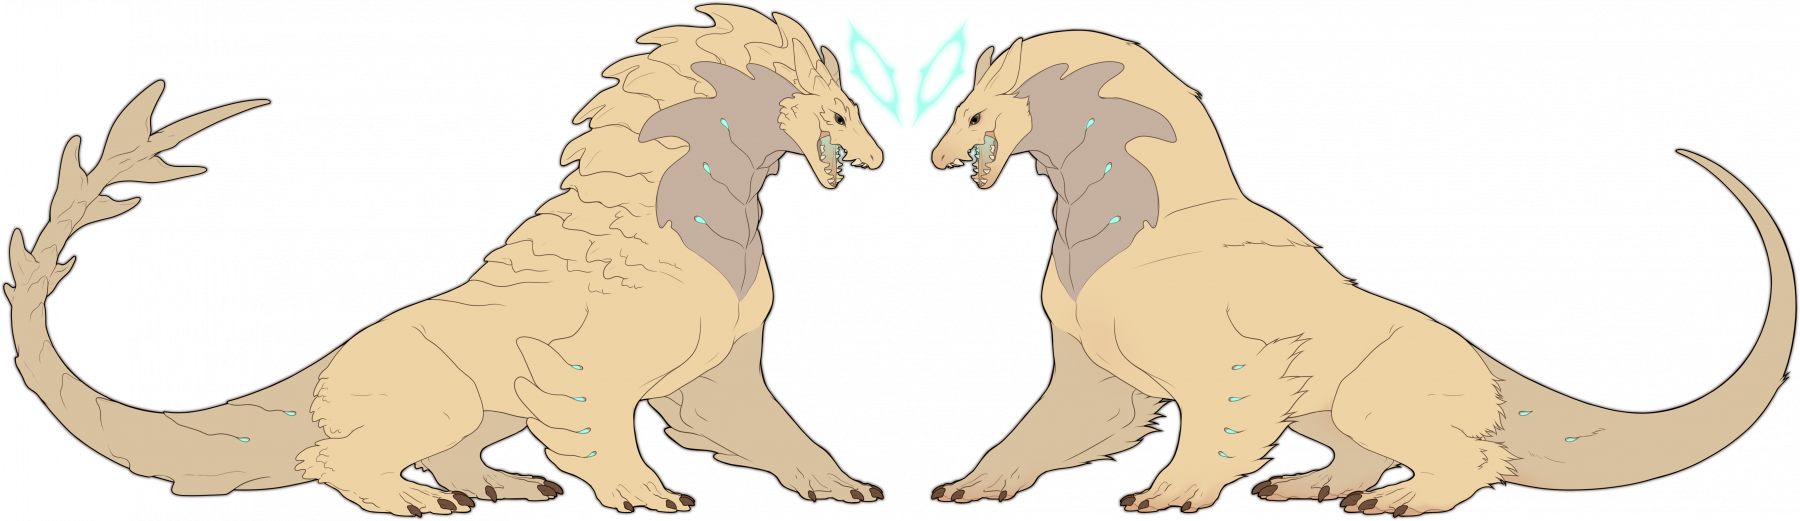
Did you know? The plates on an armored rexals coat were inspired by pangolins!
Base Coats and Their Colors
In some cases, your Rexal's base coat might be covered by other markings, but it will still be there underneath. It is what gives your Rexal its primary hue and sets the hue for the rest of your design.
A closer look at Genes
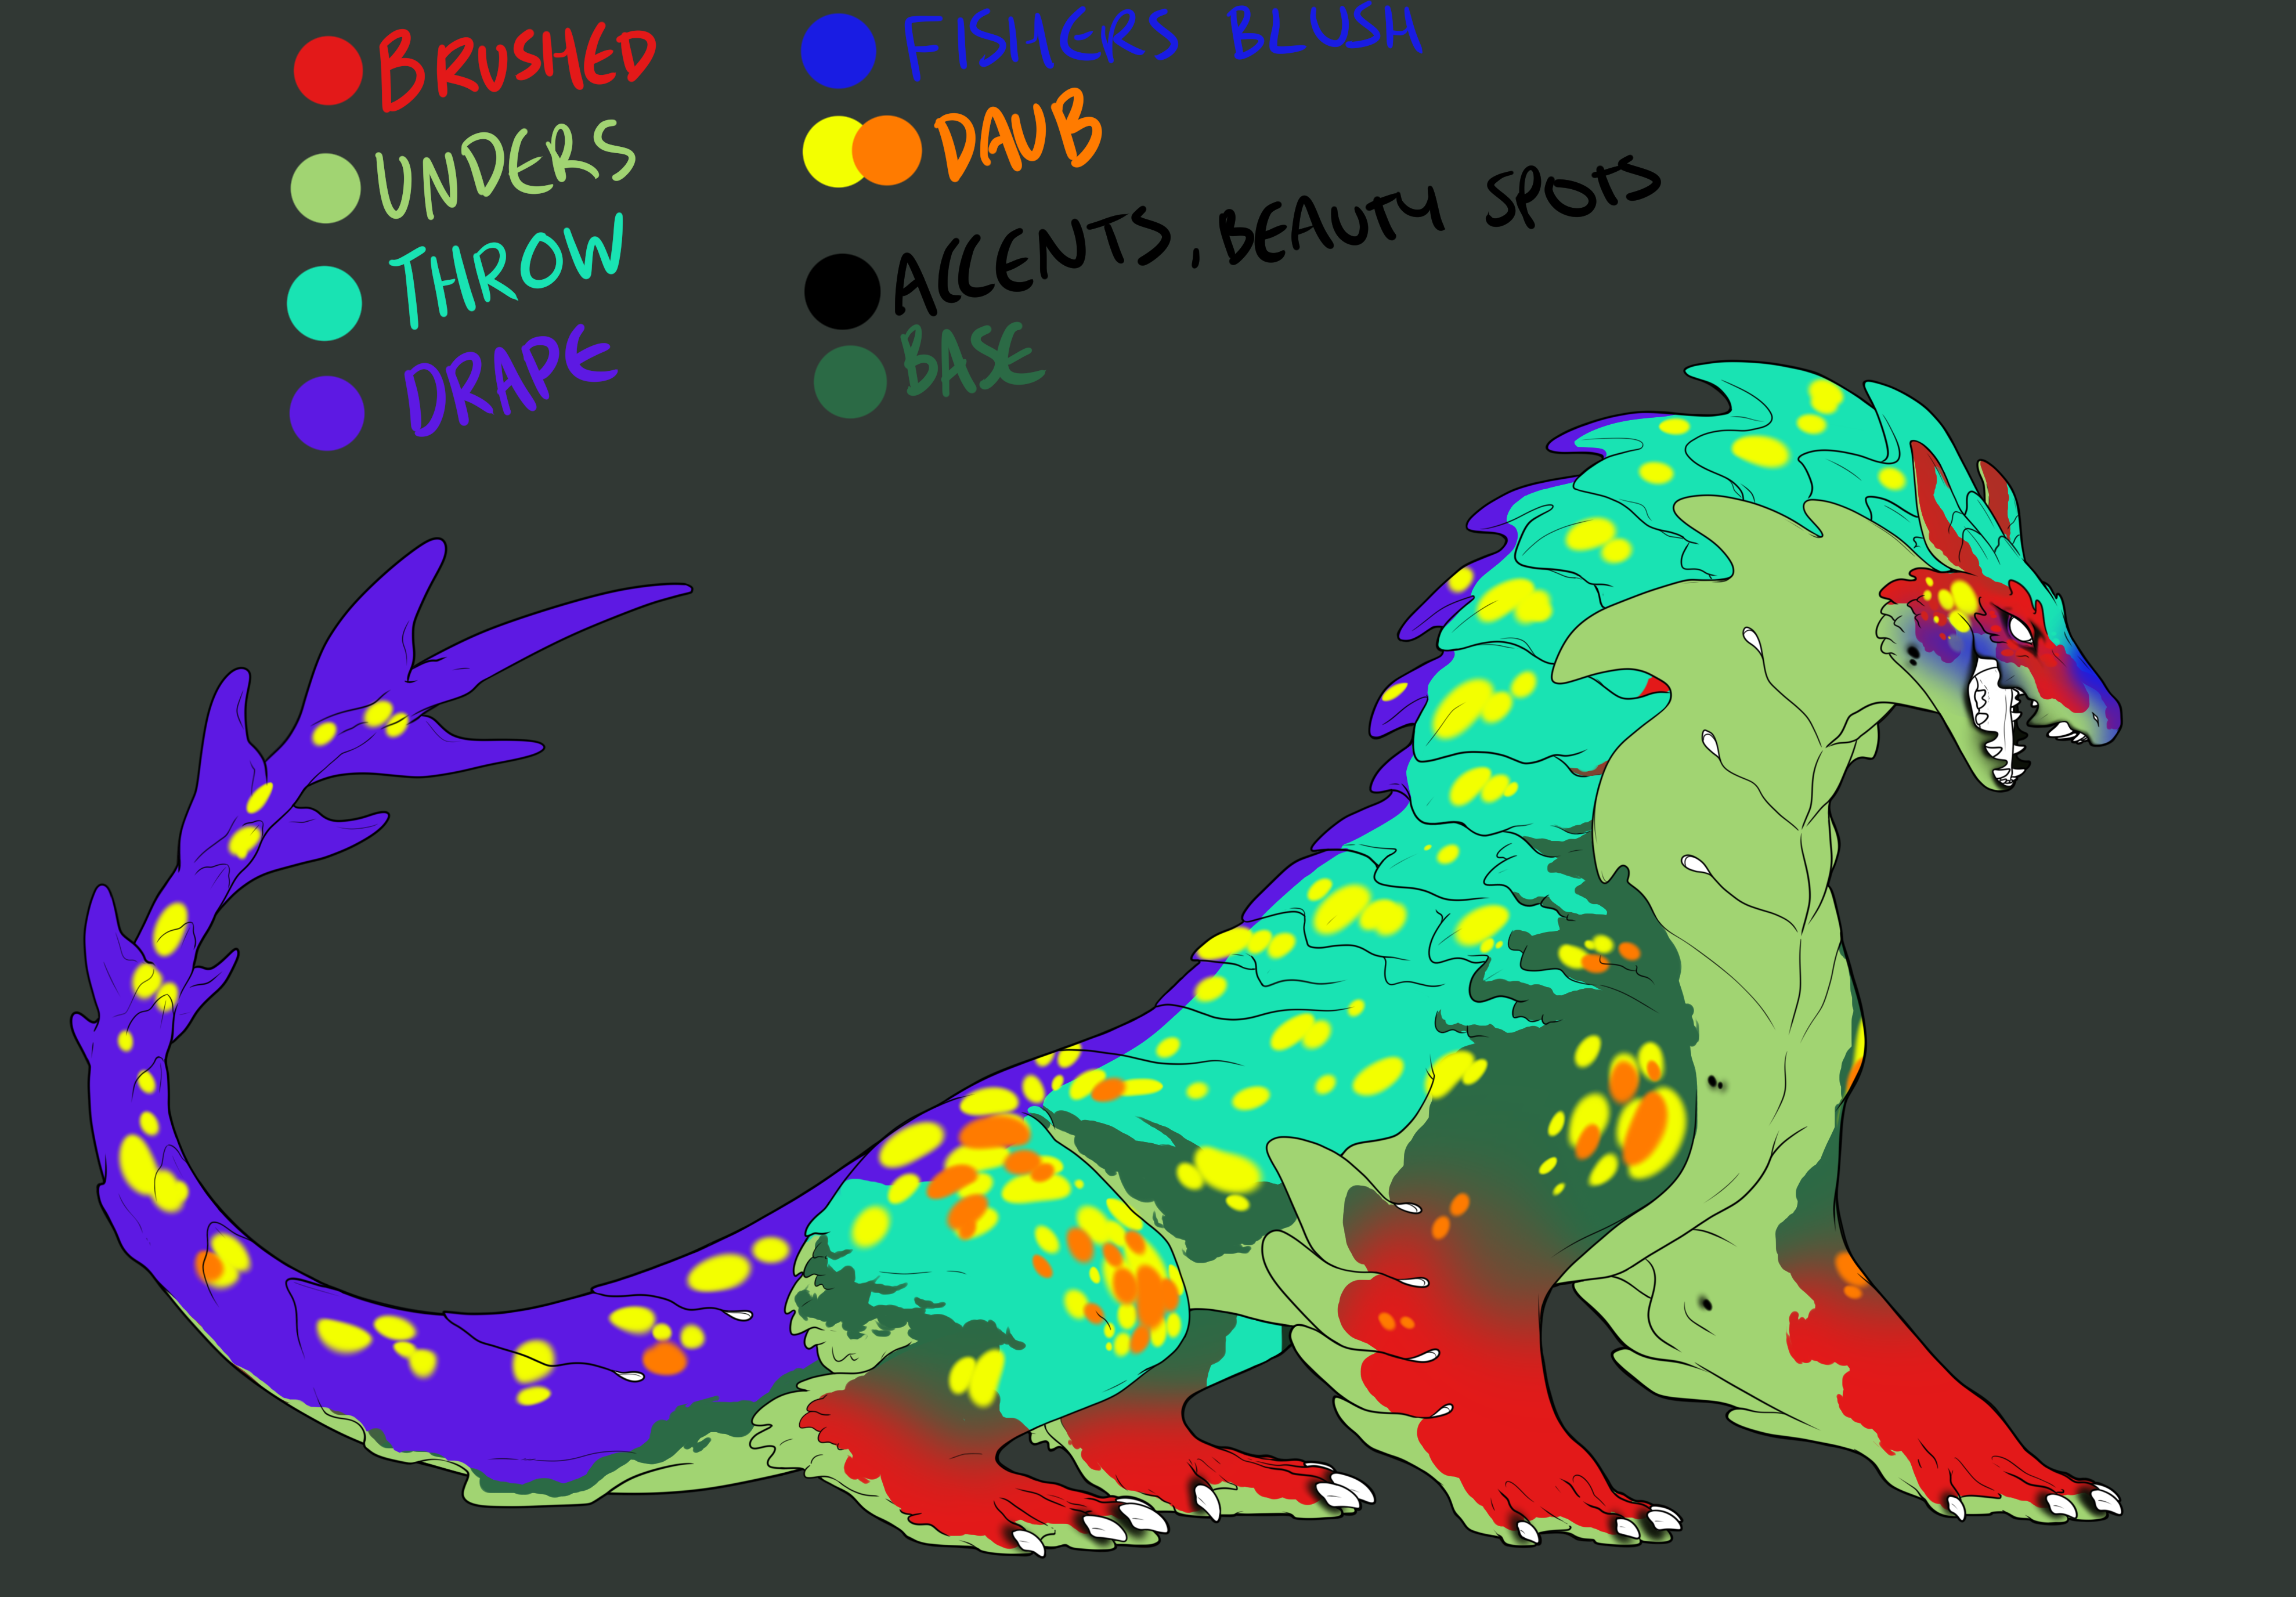
Markings: These are the unique patterns, lines, spots, or patches that appear on your Rexal's base coat. They can also vary in color, and depending on the specific marking type, can have distinct color rules to follow.
The combination and placement of markings on your Rexal play a significant role in defining its appearance. Markings have their own guide, so you should definitely check it out if you are curious about their overall color rules!
Marking & Their Colors - A guide
Mutations: These are unique traits or genes that randomly pop up in breedings or geno rolls. If you see a gene written in italics in your geno when you receieve it in a breeding, it didn't come from the parents – it's a surprise addition! Just like other genes, mutations can be passed down to offspring.
Free Markings: Just as the name implies, these are extra markings that you can add to your design, even if they aren't listed in your genotype. They won't appear on the rexal's genostring, but you must include them when you submit your design in the Free Marking section of the form, so the moderators can keep track of them. Each free marking has its own set of rules, so be sure to familiarize yourself with those rules to avoid any design approval hiccups.
Under 3 Genes Free Markings: These are special markings you can choose when your genotype only has 3 or fewer genes. They work just like free markings, but are only available for less complex genotypes that have only up to 3 genes (minus the base coat). Example: Dune with Throw, Swathes and Daub
Additional Import Areas
Eyes cannot glow unless your rexal has the divine status.
Divine Eyes: Once a rex reaches the divine level, you can make their eyes glow with the color of their halo. For more details on Divine Eyes and Magic, please refer to the Magic Guide!
Teeth: Teeth can be white, yellowish, or off-white. You can also change them to black or gray using Charmed Paints.
Gums, Tongue, and Flesh: Gums and tongues can be any natural color, a color from the base coat slider (that is not the base coat), or black/gray. They can also be color-picked from your base slider (main or somber) or a shade of your base color, but must be visibly different and cannot be more saturated. You may choose to give the tongue a mottled look or a gradient, provided all colors look natural and fall within the rules.
Effect Layer: This layer represents the shine emitted by a rex's mouth. It must be colored with the same hex code as the halo. For more information, check the Magic Guide.
Apertures are also able to be flesh colored! Otherwise, please look at the Magic Guide !
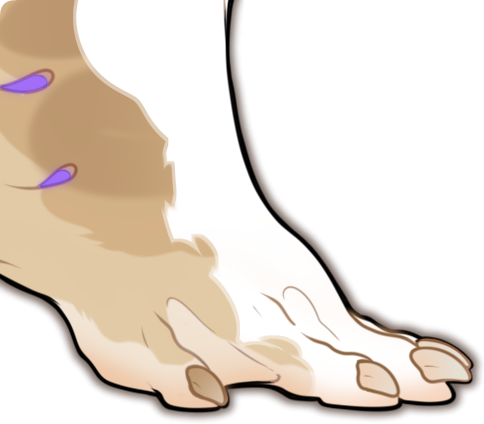 |
Claws: Claws can be yellow, white, gray, black, a natural color, or a color from the base coat slider (that is not the base coat). They can also be color-picked from your base slider (main or somber) or a shade of your base color, but must be visibly different and cannot be more saturated. If snowed or another white mark affects your rex's coat, the claws can have different colors where the white meets them. |
Optional Layers & Help Layers
Selection Layer: The layer that colors only parts of the rex is simply there for selection purposes, which makes coloring easier! You care free to ignore it.
Pink Sheen: Has it's own guide here
Import Backgrounds
IMPORT BACKGROUNDS MUST BE TRANSPARENT
 |
Lineart Coloring: Add a touch of softness to your Rexal design by coloring the lineart! But remember to keep a balance - the lineart should never be too light and should remain clearly visible. |
| Import Halos: Want to make your Rexal pop more? Try creating an import halo around your Rexal! Here's a quick way to do it: simply copy the base color layer, select it, expand the selection, and fill it in. You can make the halo soft, dark, colored, or even double-edged. But don't make it too large or disruptive. If you prefer, you can use the ready-made import halos in the PSD - just recolor them to your liking. |  |
 |
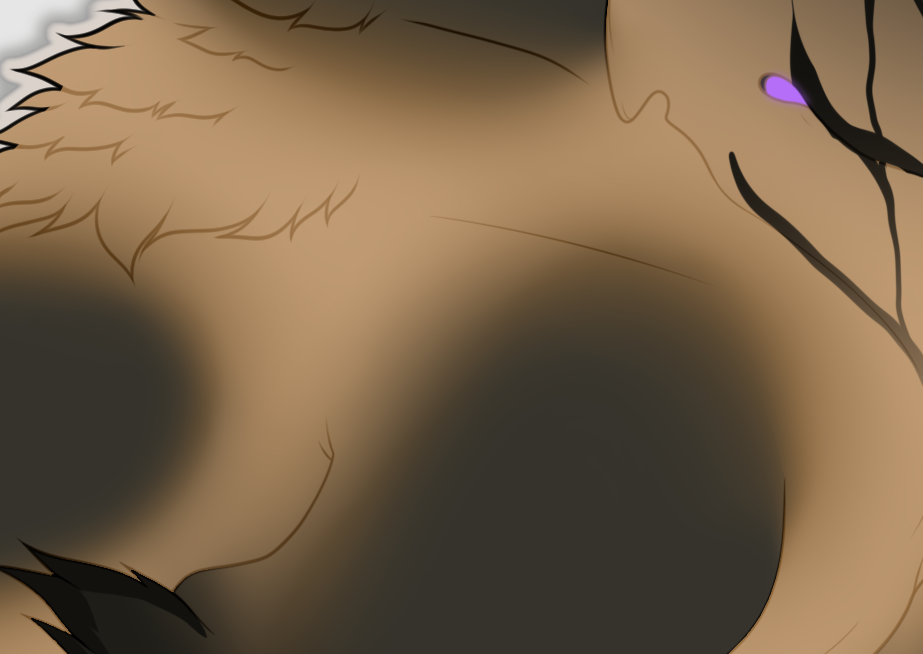
Backdrop Behind the Head: Placing a backdrop behind your Rexal's head can enhance the magic halo. But be careful! This backdrop should not be mistaken for halos or special traits and should not be cut off at the edge of the canvas. You could use a soft brush to darken the area behind the head, or a hard brush to add a dark circle. This backdrop should always be black! |
| Selective Shading: Consider shading certain parts of your Rexal's design such as the eyes, teeth, mouth, claws, and apertures. However, remember, if you want the apertures to be shaded, they must be flesh-colored! Remember that anything that is not in the extras folder cannot be shaded! |
 |
 |
Soft markings are able to have edges that are hue shifted to flow smoother into the base coat. Don't overdo the saturation here! |
Things you cannot do!
| Can I put a Logo, Writing or Icons on my Import? Unfortunately, we do not allow this anymore. With the current features of the website, we want them to be the optimal way to work with attire, overlays or the wardrobe. |
| Can I do a 3d effect? Sadly, not anymore. Many of our mods and users reported to get dizzy from this particular effect. Hence, we decided to dissalow it, as hard as that decision was. We don't want anyone to have a hard time from looking at an import. |
Quick Design Checklist
Are all of these good to go?
|
Design Notes
  |
If your design is complicated it's always better to utilize the 'Design Notes' section in the design submission form. This greatly speeds up the design approval process and reduces the liklihood of your Rex being corrected, as mods do not need to guess what is happening with your design. Showcase Your Markings (Optional): To help the design check mods see your markings clearly, you may wish to include screenshots of the markings when they aren't overlaid by other layers. This clarity can significantly speed up the approval process! |
  |
If your design is particularly complex, you may be asked to provide a marking map. Your design will not be removed from the queue but will be placed on hold until a map is provided. |