Marking Guide
Base Rules
Marking Layering
The marking type determines which layer on your rex it can sit! Here's the types:
MODIFIER - Modifies other markings.
APEX - Always lays on top, but can be above or beneath each other unless the marking is a pure white marking like snowed. Then it MUST lay on top!
MAVERICK - Normal type of marking, can be above or under each of the ones in this group.
BASAL - Must be applied under all other markings. If there are multiple Basal markings in your geno, they can lay above or beneath each other.
Quick Tricks and Allowances
Rexalia has a few things you can do with your markings to make them look fancier. These are not a requirement, but can look good if you utilize them right. These things are allowed and will not be hit in the design approval process:
- White markings are generally allowed to have a slight tint to soften the impact on the design. They can also have a slight tint on their edges and/or be pinker when they show on thin fur or scales. They have to still overall look white on the design, though. This is highly subjective and is likely to be hit by corrections if you are not careful.
 Scroll down for more info on white markings!
 - All hard markings can have a subtle double edge to break them up. Don't overdo it, though, since sometimes this can give the design team a hard time, which will lead to corrections.
- Markings are also allowed to have a subtle watercolor border, if you want them to. Don't make it too dark or emulate Frontier.
- You are allowed to have one marking carried. This means it does not have to show on the import. Put the marking you decided to have carried into the form when submitting your designs.
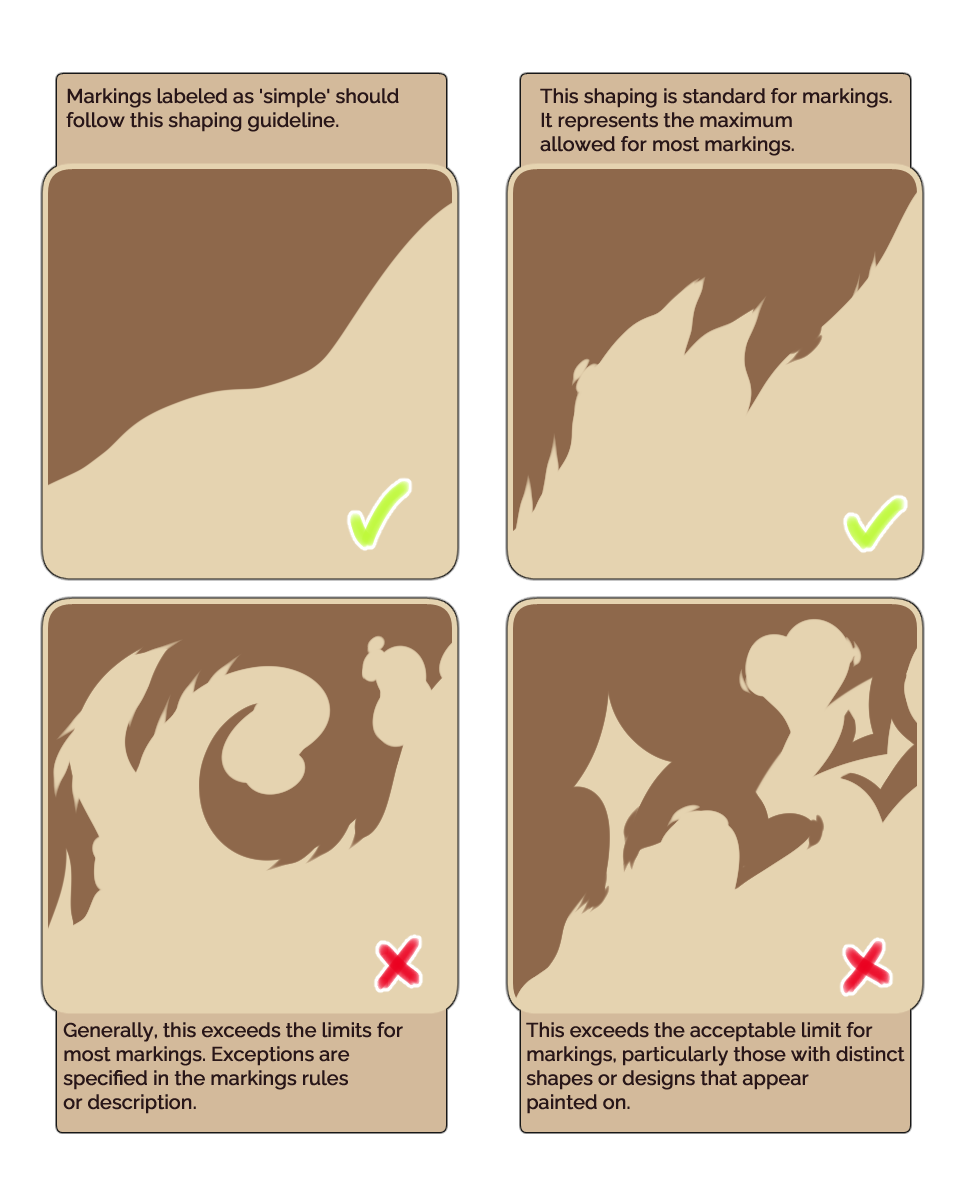
Marking Shaping
Understanding Marking Colors
![]() All markings must follow the marking color rules on their respective guides first and foremost!
All markings must follow the marking color rules on their respective guides first and foremost!
![]() Make sure to check each guide for each marking to understand them. If a moderator sees something wrong with your design, they will decline and you will have to correct it.
Make sure to check each guide for each marking to understand them. If a moderator sees something wrong with your design, they will decline and you will have to correct it.
![]() Sometimes markings have interactions with each other, which can create special rules that affect their color and behavior.
Sometimes markings have interactions with each other, which can create special rules that affect their color and behavior.
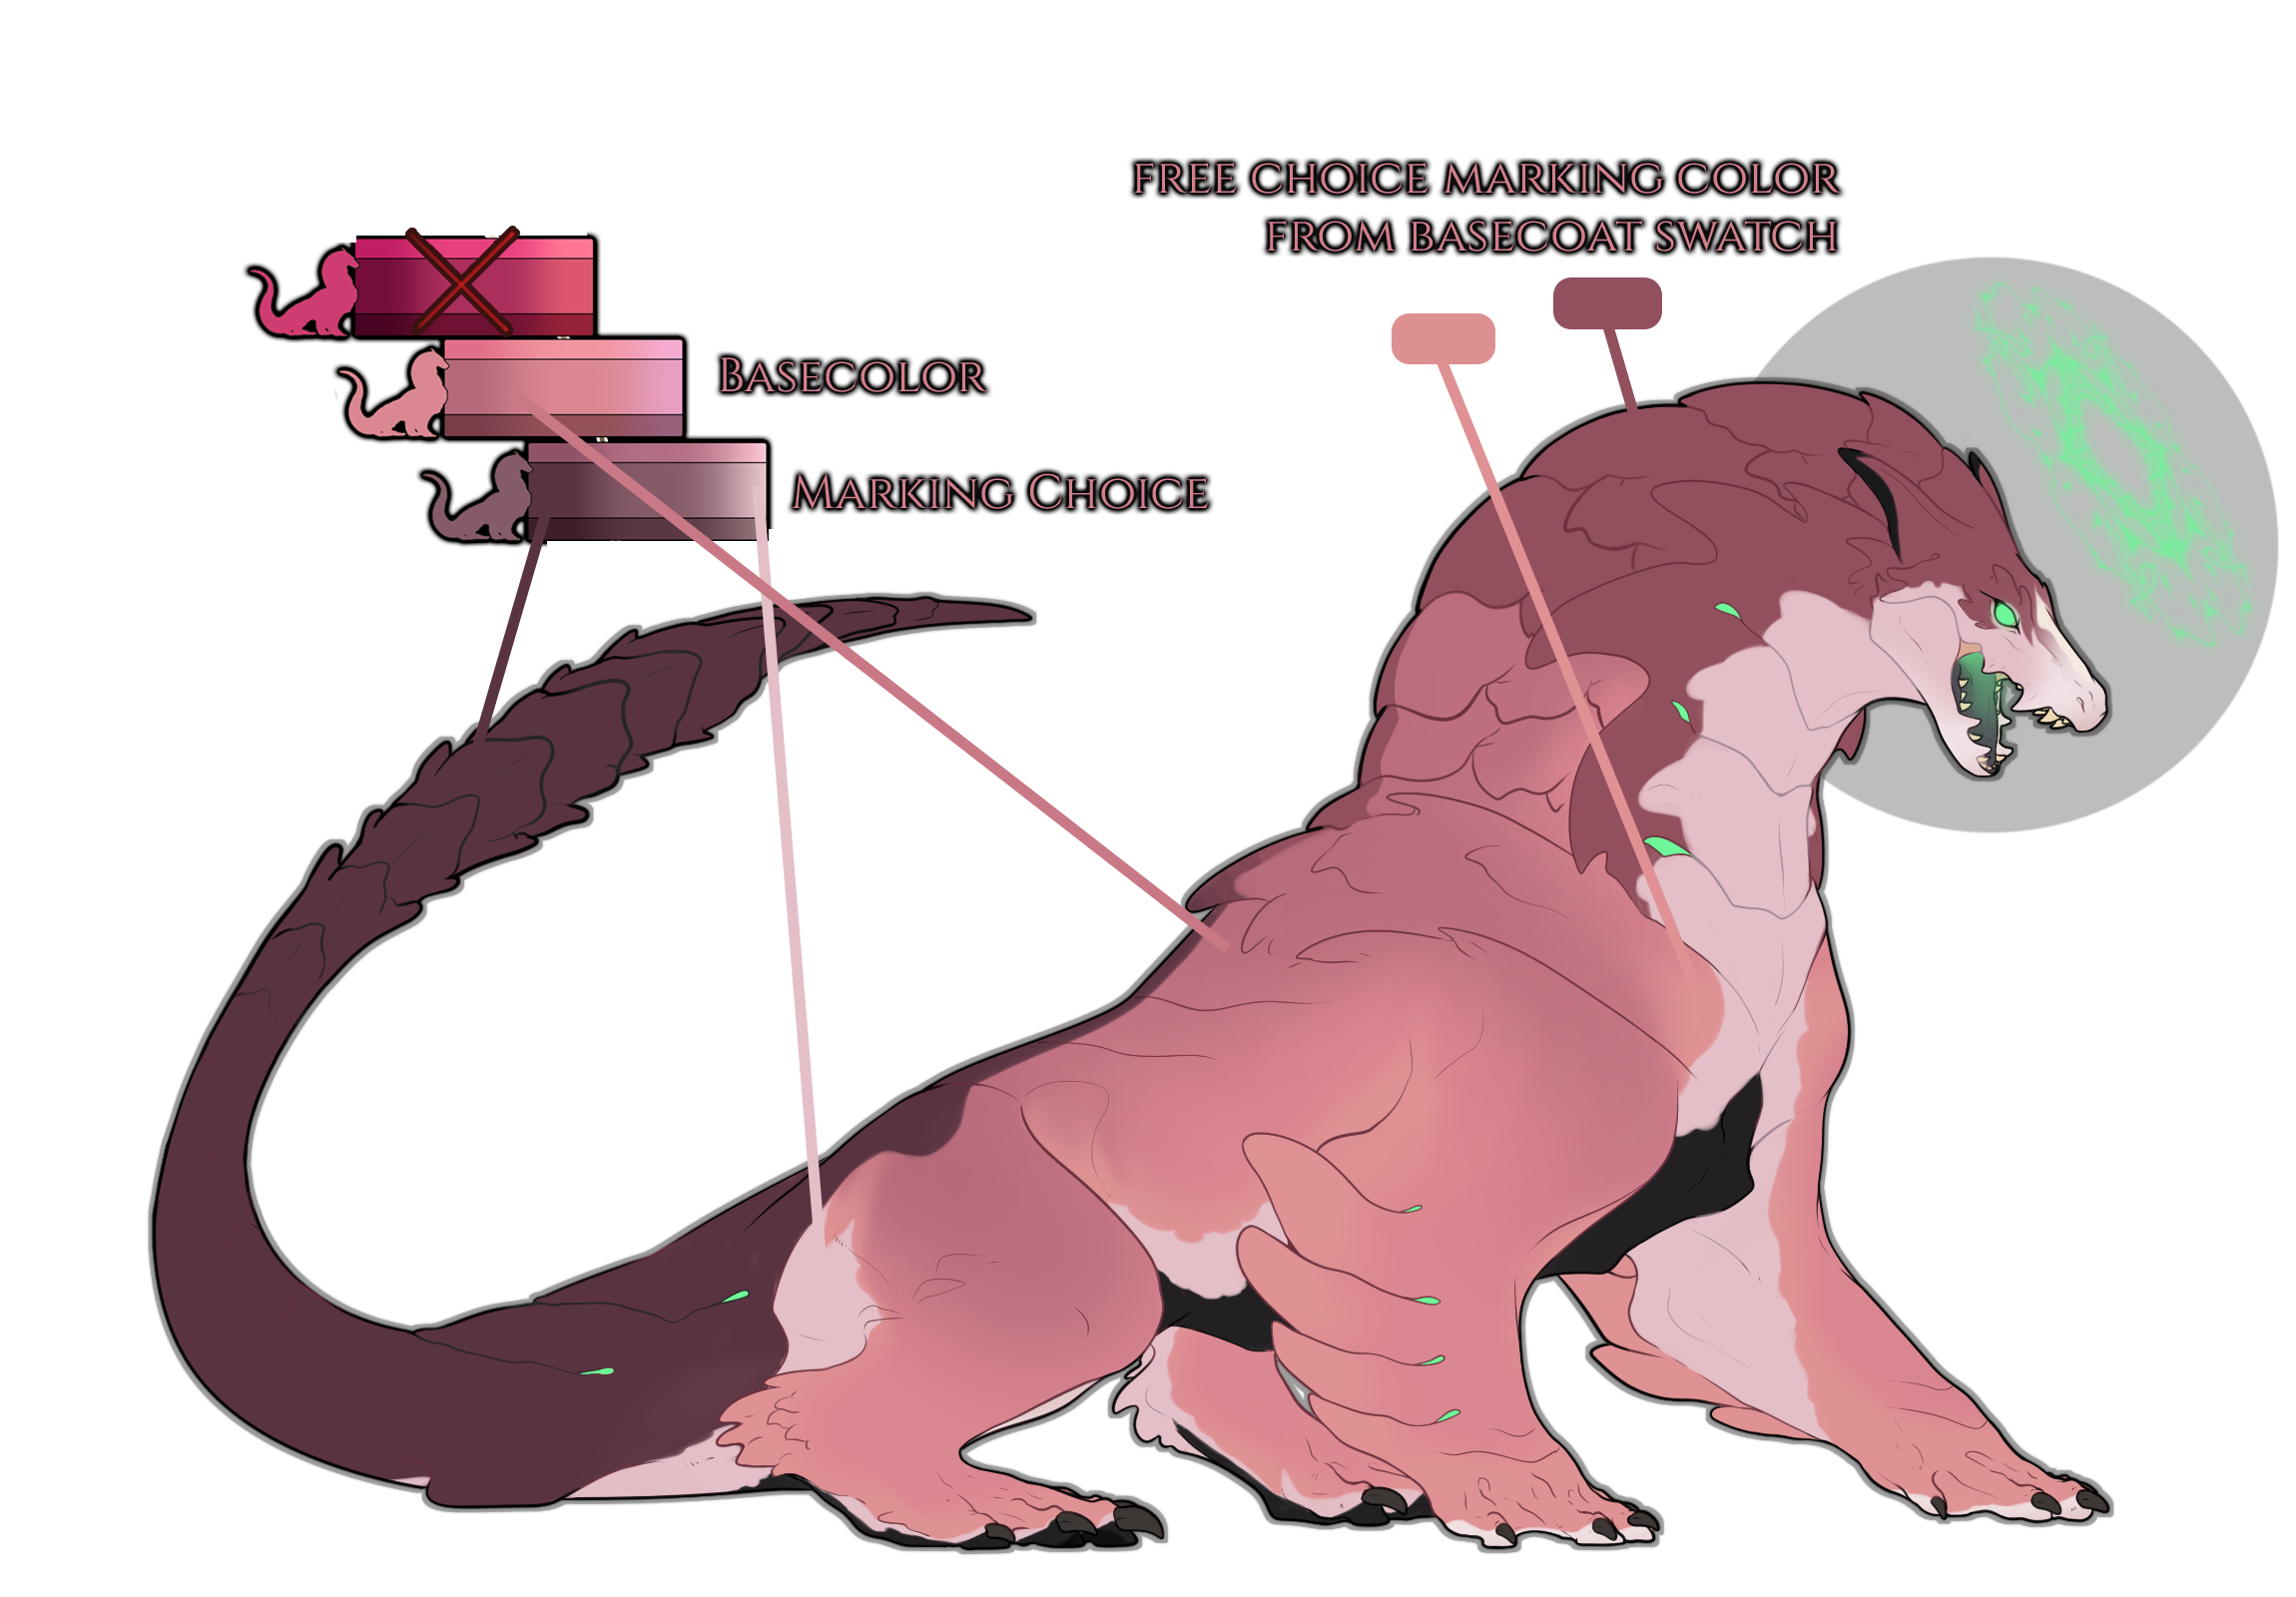
Marking colors for rex are somewhat restricted. They don't have to be picked from the slider, but should always reflect the basecoat color of your rex and should never deviate too much from their respective hue.
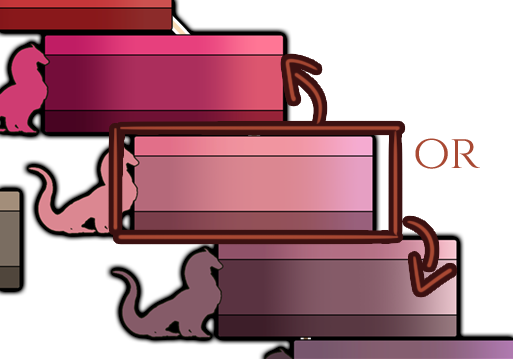
However, there's an exception to this rule. You are allowed to choose one other slider to implement in your design! This slider should be either the one that comes before or after your basecoat one. Markings that use another slider MUST be color-picked directly from that slider.
Saying this, markings must still visually follow their lighter than/darker than base rules; if pulling from the swatch does not allow this, you cannot use the swatch for that marking.
Note
It is your choice to make, just like so:
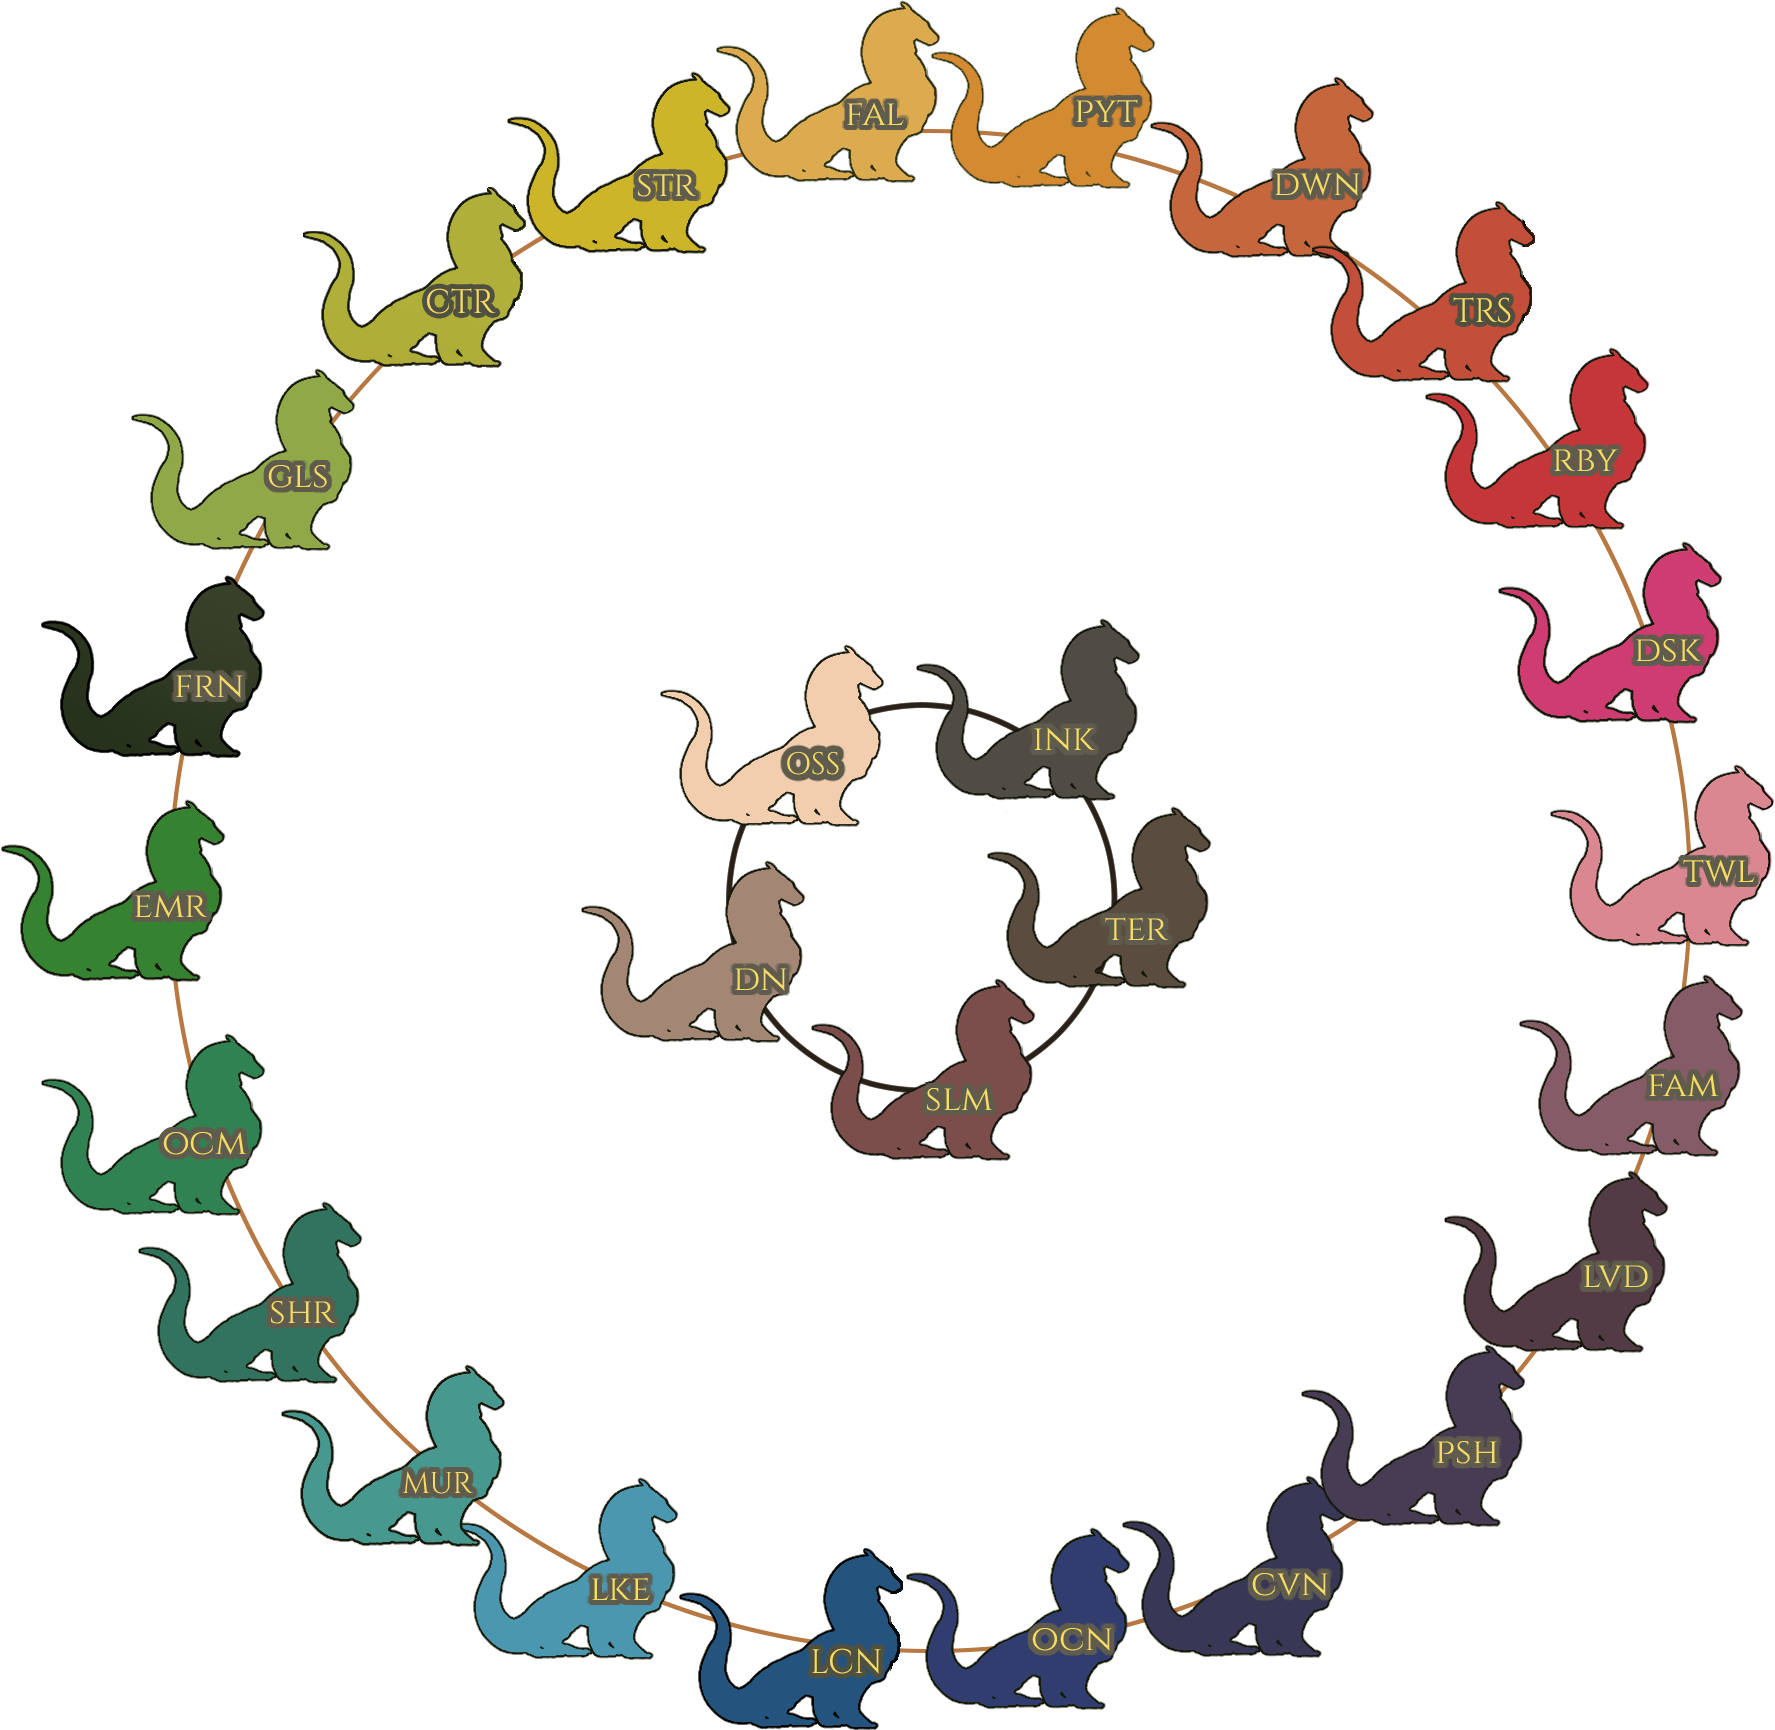
What About Ink, Terra, Solum, Osseus and Dune?
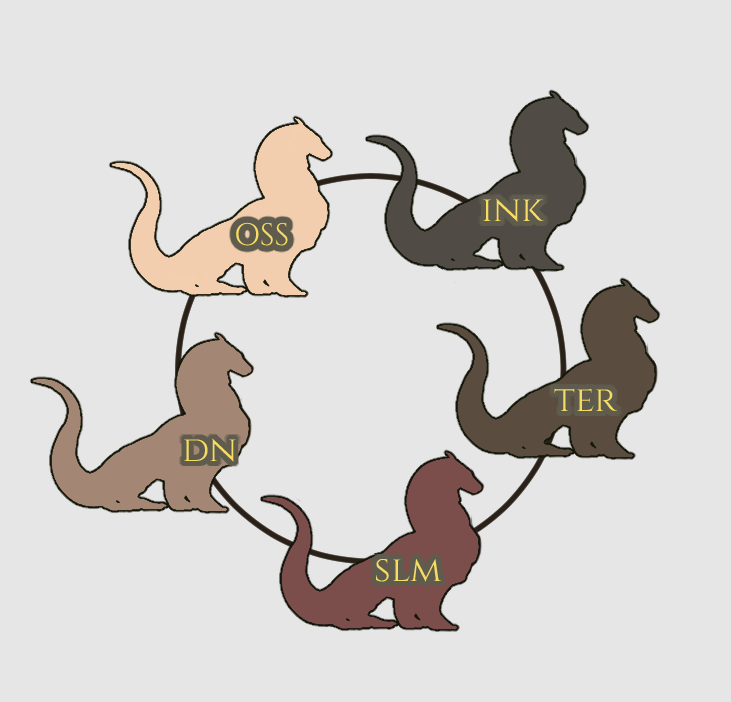
These five, sitting nicely in the middle of the wheel are their own category. See them as a circle. For example, if you have ink you can choose one of the other four sliders to do your markings with and the other ways around. This makes any of these five fairly special when it comes to color freedom, since you have 4 sliders to choose from instead of 2.
What other options do I have?
All markings listed in the genotype have the ability to be black or white, within their own color rules.
If you take this option, select your color from these sliders:


So what options do I have for Marking Colours?
-
Marking colors can be picked from the main and somber slider of your base coat.
-
Marking colors can be the same hue as your base coat and go off slider.
-
They can be colourpicked from an adjacent base coats main or somber slider.
- They can be Black or White.
Handling White Markings
All white markings have the ability to be tinted in a way to make them less harsh on the base colors. This means as long as the marking looks white it will be allowed. They can also have a slight tint on their edges and/or be pinker when they show on thin fur or scales. They have to still overall look white on the design, though. This is highly subjective and is likely to be hit by corrections if you are not careful.
The hue of white markings should still fit the design, which means on a totally orange design, a blue-ish tinted white may come back from design approval for corrections.
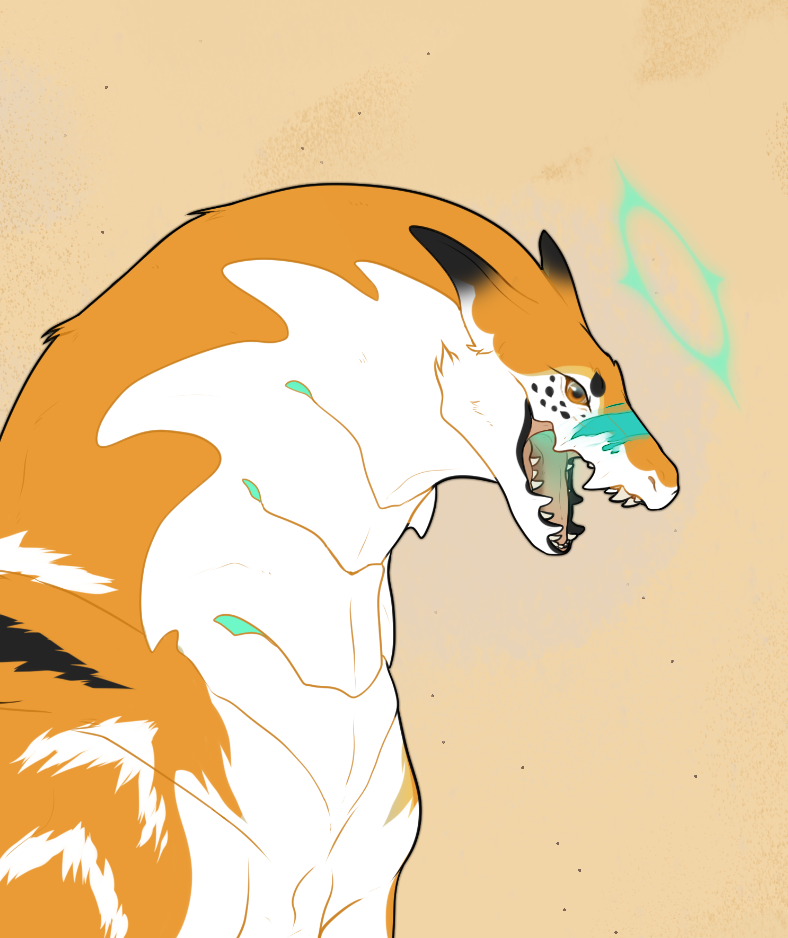
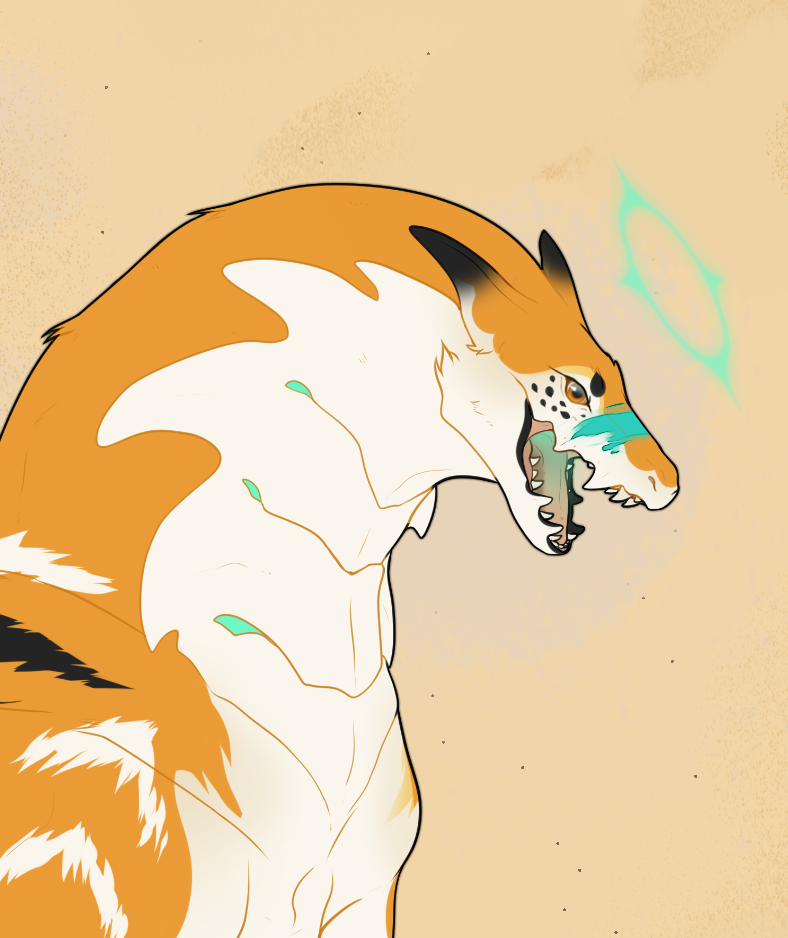
Let's see some examples!
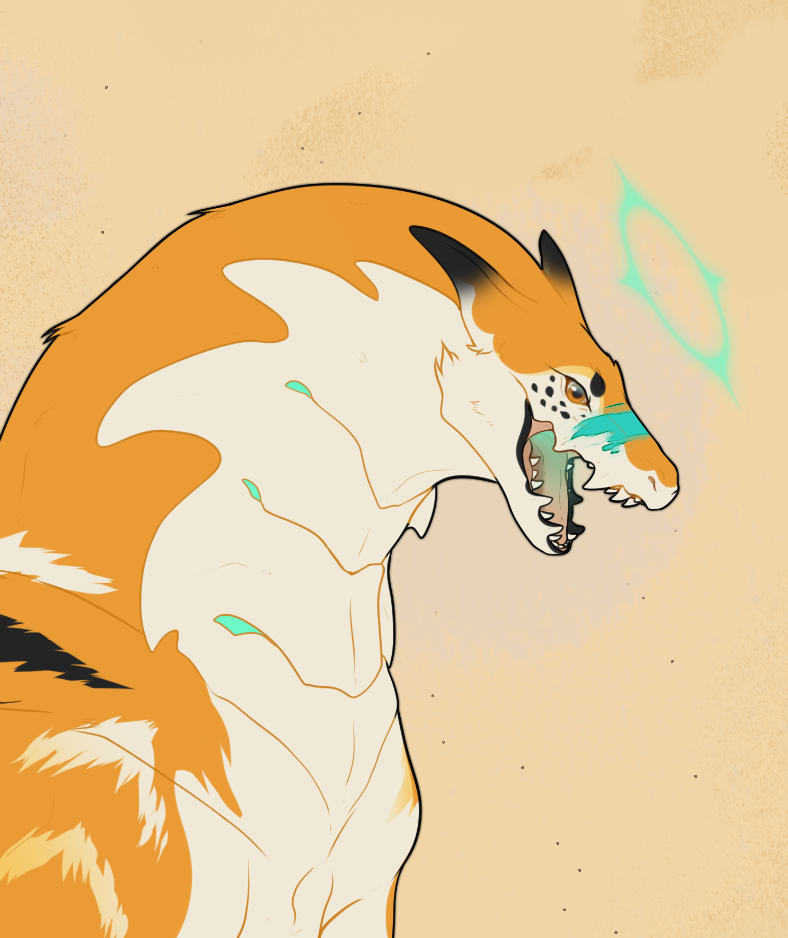 |
This design is completely fine. As you can see, the white reads as white, still, and it has the right tint. This would be approved. |
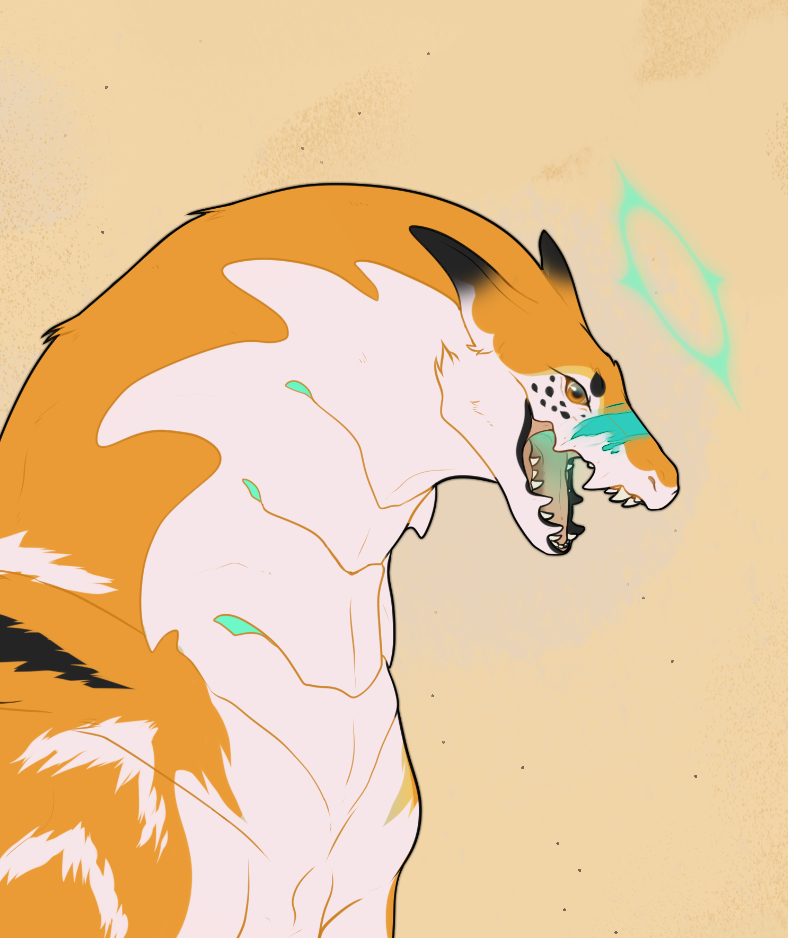 |
This is way too pink and won't work. Even though it looks still fairly white on the design, it will be rejected for being way off hue. |
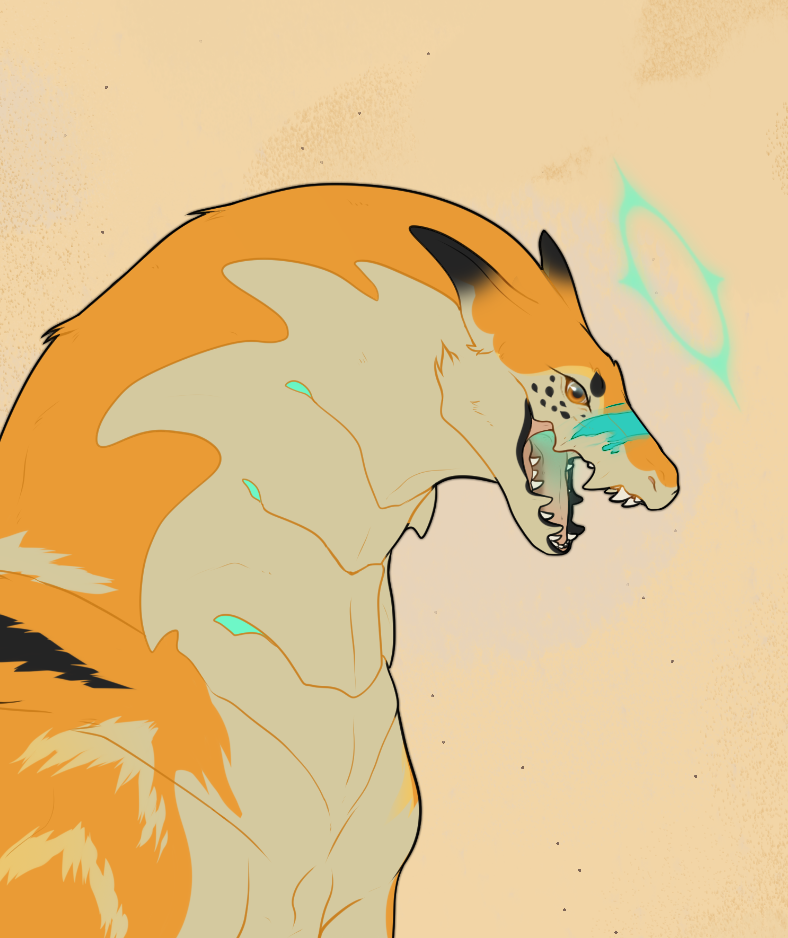 |
This is way too dark and does not read as white at all. Be careful not to make the white in designs too dark. |
 |
This is a hue of white directly picked from the swatch. Even though it is the wrong hue, it would still be allowed, as long as it was picked directly from the given color ranges and we can easily find it. |
 |
This is 100% white and would be accepted. It is your own choice to do this. |
What do you mean by "tint the edges"?
In this design we see the white markings have slightly tinted edges near the shoulders and the ears. This makes the whites not as harsh.
Keep in mind: this has to be subtle and well blended.
![]() Markings can NEVER be gray, unless your geno has "fade"!
Markings can NEVER be gray, unless your geno has "fade"!
Markings can be desaturated, but still have to clearly read as color. Never desaturate them so much that they read gray in any way.
This rule is completely moot, and does not apply, for Void & Akoya
Color Permits
Color Permits

Markings themselves can have the same color as long as they don’t emulate an entirely different marking!
This is only the case, if you provide the design check mods screenshots of the markings when they are not overlaid and/or temporarily color them in bright colors to show them better.
This is to help speed up the design approval process! If you want, you are free to explain in depth how your markings are layered, where you put what or what special cases you used. This, however, is optional (still greatly appreciated!)
Here are examples of such screenshots:
Base Design
And
Free Accents + Second Layer of Brushed
First Layer of Brushed + Drape
Edge Types
Edge Types
Most markings give you several edges (hard, semi-soft, or soft) that you can choose from. Always remember you can only choose ONE, unless the guide specifically states that you are able to mix.
Markings are able to have a slight softness to them, even if the guides specify they are hard edged. As long as they look hard-edged zoomed out, you will be fine.
You are allowed to put a fur texture wherever there is longer fur present on the furred coat!
Generally, hard edged markings are allowed to have a very subtle halo to make them look softer, like this:
Here are all the edge permits that exist:
Edge Permits


Example On Novissime
As you can see, the markings drape and unders were directly picked from the famine swatch. Hood and pangare were chosen freely to reflect darker and lighter from the basecoat respectively. Both of them have a slight hue variation that still does not reflect another basecoat color, despite doing so. Please be careful if you deviate from the basecoat, since it is easy to slide into another basecoat territory.
In this example, the base coat is Twilight. Twilight can pull from either Dusk or Famine for marking colors; here, the chosen swatch is Famine. Remember, you can only choose ONE of the two adjacent swatches to use!